

Whether we like it or not, Zoom meetings are now an integral part of our workday. In today’s remote-first environment, many rely on Zoom to connect with their teams, users, and customers.
While Zoom helped us to run meetings and webinars reliably, the dramatic increase in usage of the product created a new problem: discoverability.
If your week typically has a handful of meetings, you’ll end up with a few dozens of recordings to go through at the end of the month. That’s hours of content to parse through! Needless to say, it's nearly impossible to quickly find, and leverage the content of these recordings without the right tools. *wink wink*.
In this post, we’ll walk you through a step-by-step process to help you access Zoom recordings AND give you a glimpse into Grain — a tool that makes it 10x easier to discover, clip, and share moments from your Zoom meetings.
Alright. Let’s get started.
How to Access Zoom Recordings
If you have recorded your meetings using Zoom, it’ll be either stored locally in your computer or on Zoom Cloud. So, there are only two places where your recordings can go.
If you have a paid Zoom account (a licensed user), your recorded meetings can be uploaded and stored in Zoom Cloud. You can also choose to save your recording locally.
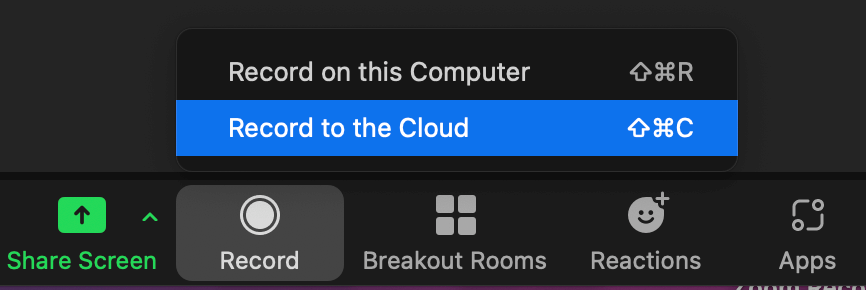
On the other hand, free Zoom users can only save their recordings locally. Let’s start with finding local zoom recordings.
Where to Find Zoom Recordings on Mac
If you’re looking to find your local Zoom recordings, regardless of your OS (Mac or Windows or Linux), all the files will be stored in the ‘Documents’ directory.
- Step 1 — Open Finder and go to Documents > Zoom

- Step 2 — Click on the Zoom folder to view all your saved recordings. Recording folders will be named based on the date, time, the title of your meetings. So, if you know the title of the meeting you’re looking to view, use search to find it quickly.

- Step 3 — When you open a recording folder, you can see the recorded files available in — .m4a (audio), .m3u (m3u file with video and audio), and .mp4 (video) formats.

That’s it! You can find your Zoom recordings stored in your Mac — in three quick steps.
A quick side question: What if you can’t remember the title of your meeting? How can you find the one you are looking for — among the 100s of recorded meetings? (we’ll answer these further down)
How to Find Zoom Recordings in the Cloud
Now let’s see how to find your zoom recordings stored in the Cloud. As we mentioned earlier, if you are a licensed user, you can save your recordings in Zoom Cloud, making it easier for you to access them anytime, anywhere.
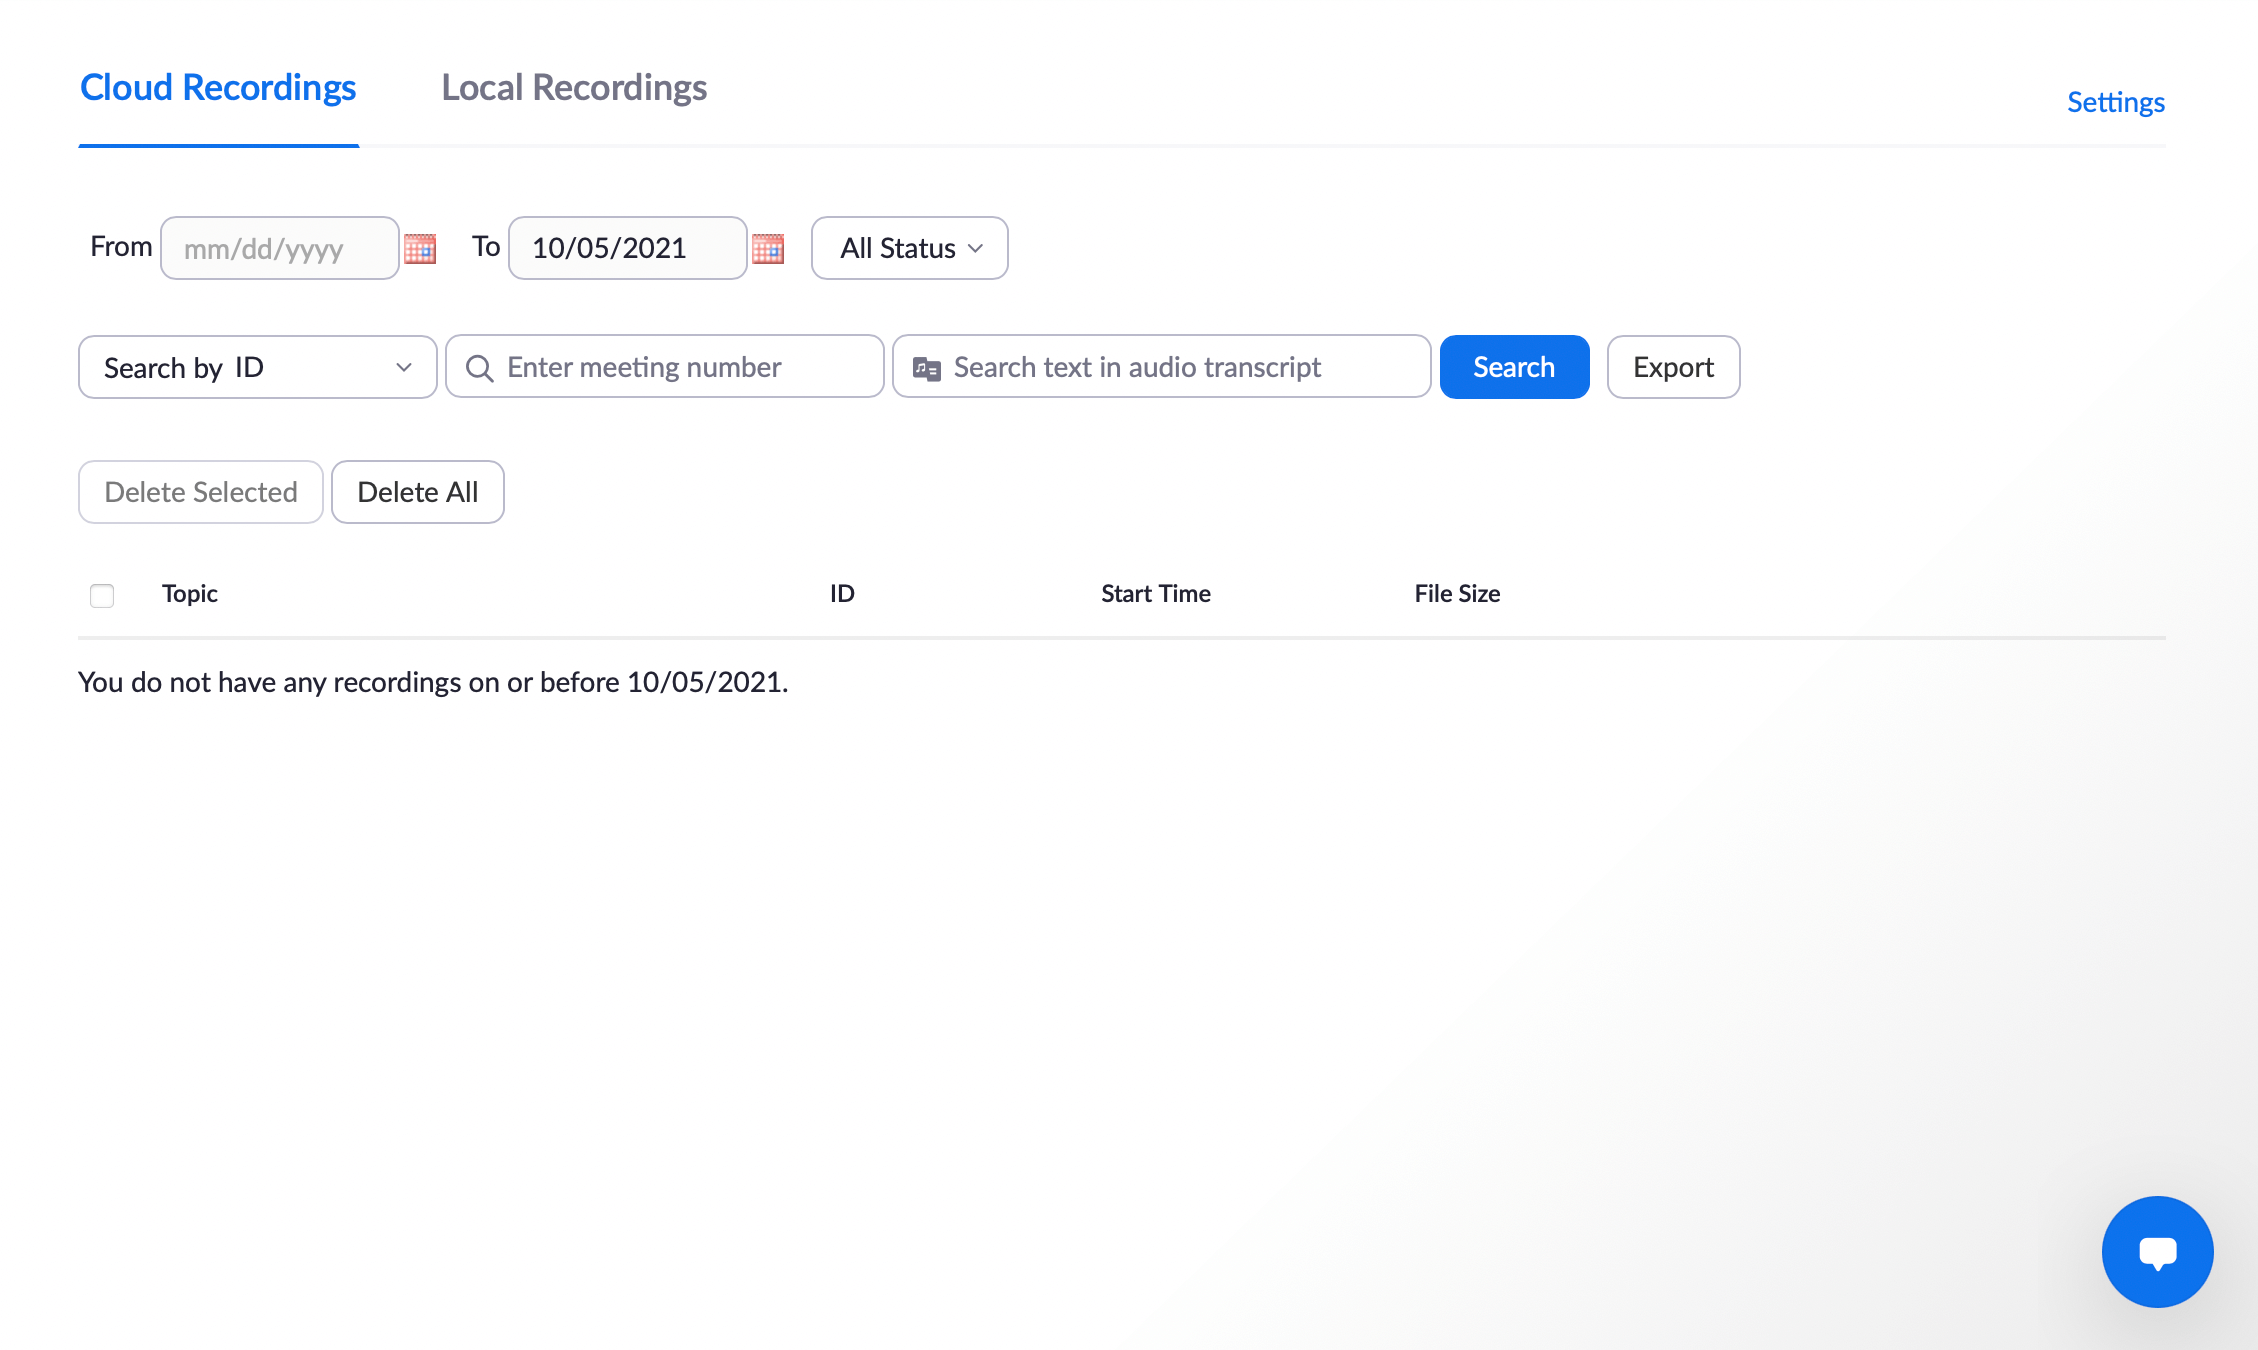
- Step 1 — Go to Zoom.us and sign in to your Zoom account.
- Step 2 — Click on My Account in the nav bar and go to Recordings tab.

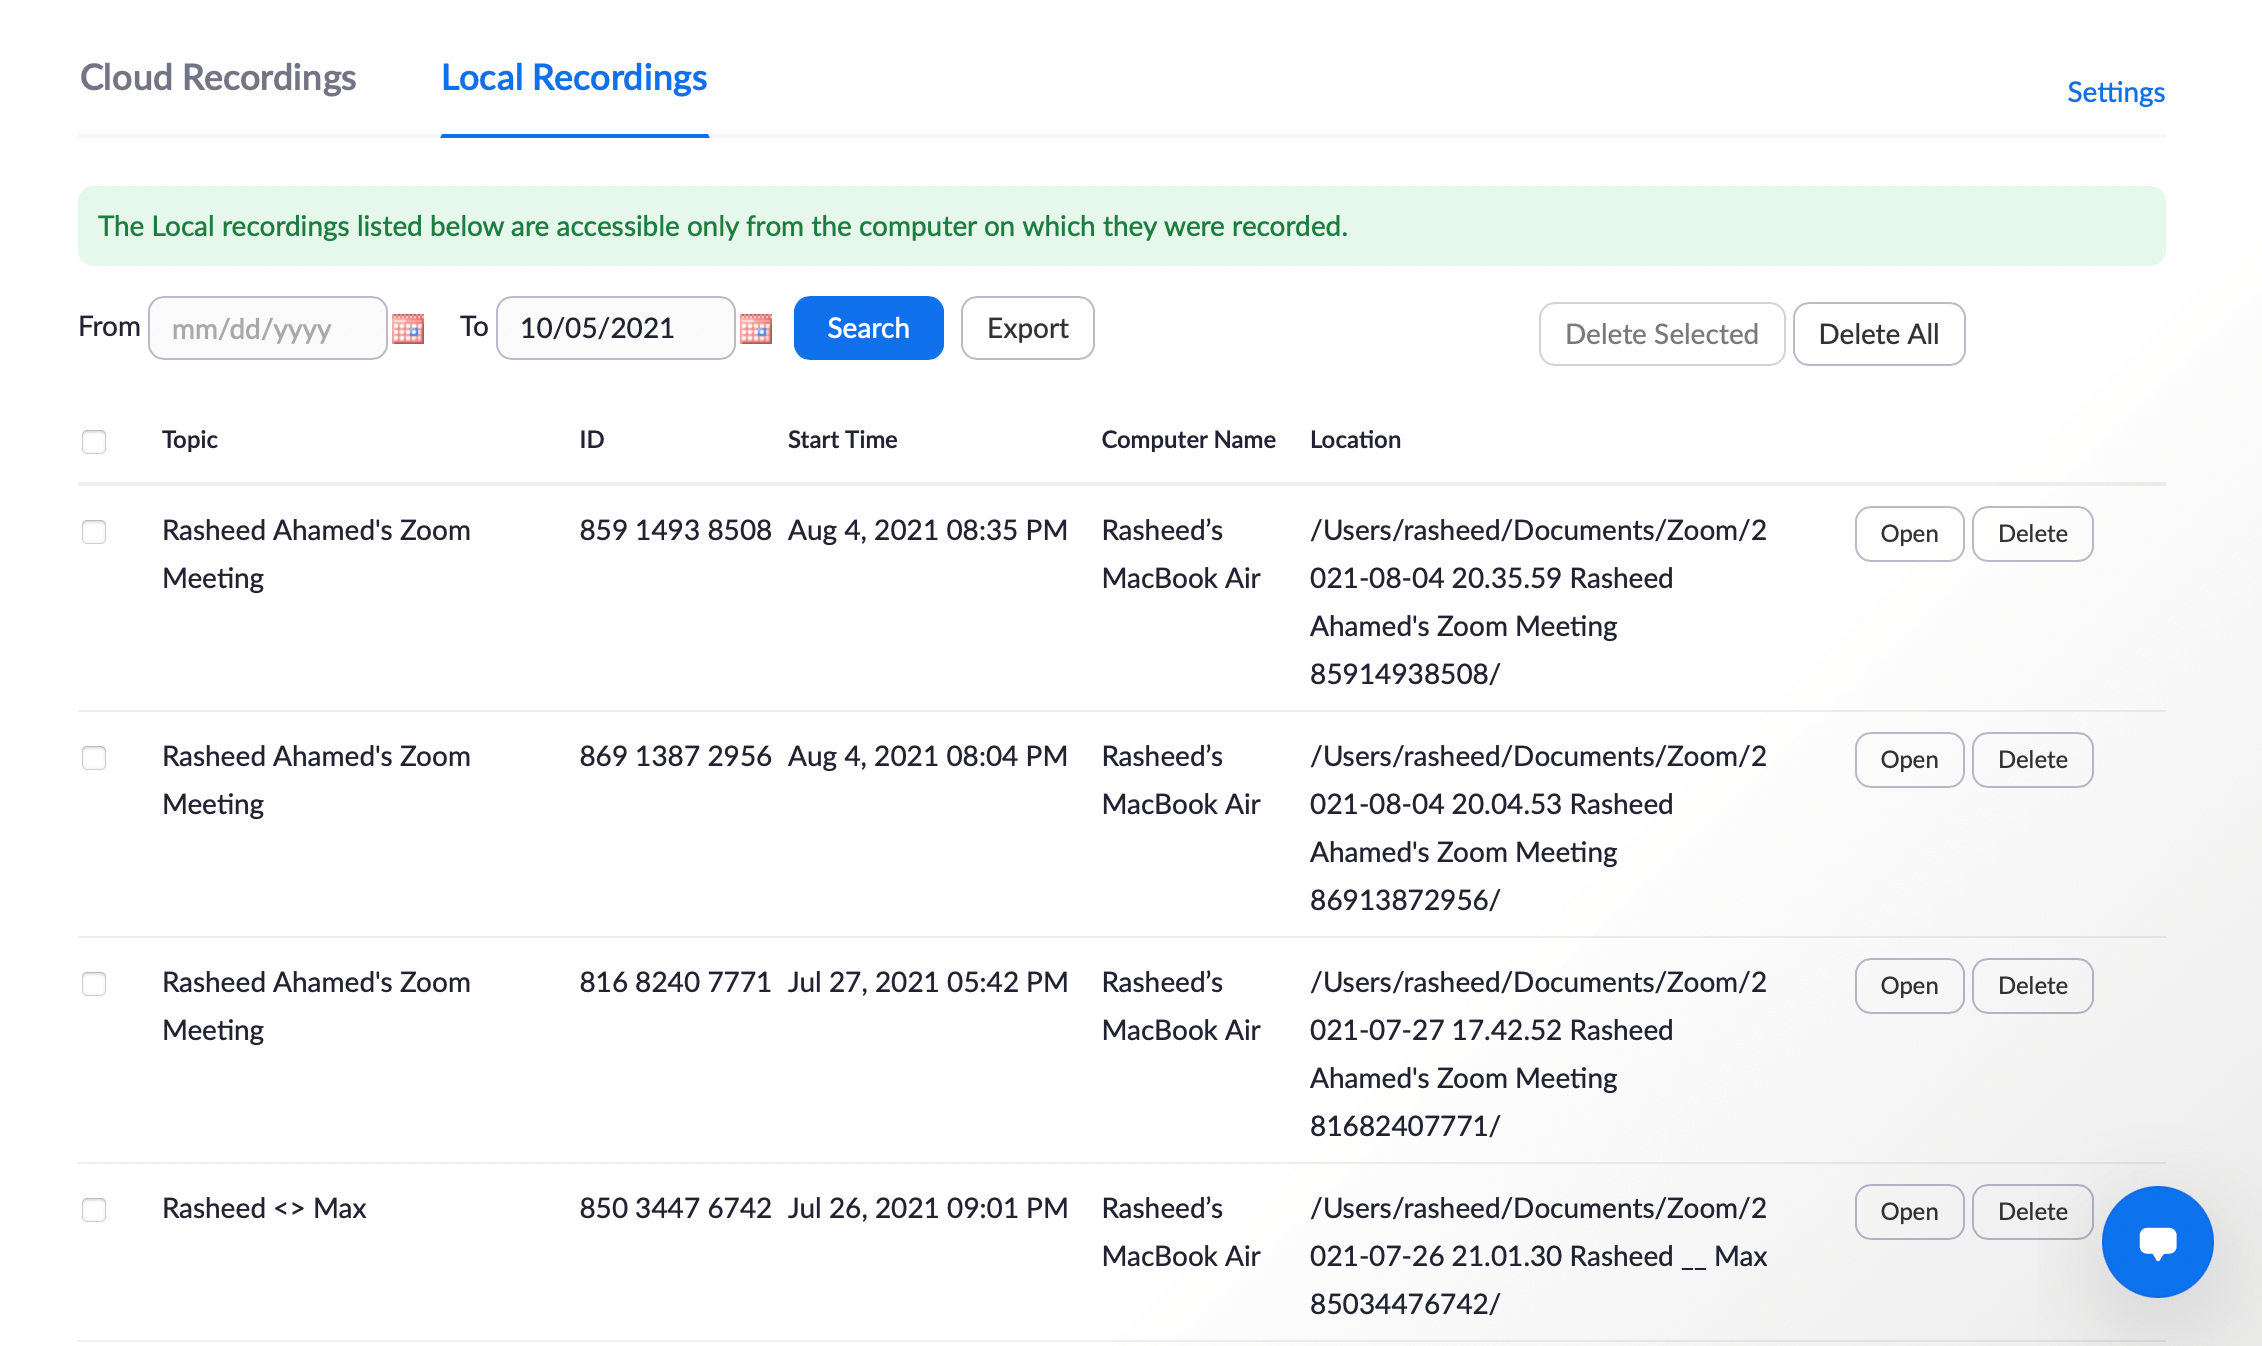
- Step 3 — You’ll see two tabs: Cloud Recordings and Local Recordings.
Cloud Recordings will show you the list of recordings stored in your Zoom Cloud. You can filter them using the meeting ID, title, date range, etc.
Local Recordings will show you the list of recordings stored on your computer. Note that you can’t open it — if you aren’t on the same computer you used to record the meetings.
A quick side question: What if you just want to watch a particular moment (not an entire recording) and share it with your teammate? (we’ll answer this further down)
How to Find Your Recordings via Zoom App
You can quickly find and play your Zoom recordings using the desktop client as well. If you have the latest version of the Zoom desktop app, you can find the recordings under the Meetings tab.
- Step 1 — Open the Zoom desktop app and sign in to your account.
- Step 2 — Click Meetings tab.
- Step 3 — Switch to Recorded to see the list of recorded meetings. You can select the meeting with local recording to open/play the file.

Note that, if you try to view the meeting with Cloud recording, you’ll only see the Open option. When you open, you’ll be directed to Zoom.us to access the recording files in your Cloud. Can’t find your recording? Hit refresh to see the updated list.

Where Do Zoom Recordings Go?
Zoom recordings, if stored locally, go to the following (default) location in your computer:
- On Windows: C:\Users\[Username]\Documents\Zoom
- On Mac: /Users/[Username]/Documents/Zoom
- On Linux: home/[Username]/Documents/Zoom
If you are using Zoom Cloud, you can sign in and follow the instructions above to access the recordings.
Changing the Location of Your Recordings
If you’d like to change the location of your local zoom recordings, you can do so in just a few clicks. Here’s how:
- Step 1 — Open your Zoom desktop app.
- Step 2 — Click your Profile and Open Settings.

- Step 3 — Click Recording.

- Step 4 — You’ll see an option to see the current directory and also an option to choose a new location. Choose your preferred location and directory and you’re done!

Now that you learned how to access Zoom recordings, let’s address the side questions you came across while you went through the steps.
- What if you just want to watch a particular moment and share it with your teammate?
- What if you can’t remember the title of your meeting?
- How can you find the one you are looking for — among the 100s of recorded meetings?
Well, the short answer is, you can’t. You can’t watch a moment & share it quickly, you can’t easily search through the conversations, and you can’t find the one recording you’re looking for unless you know the meeting ID (let’s face it, no one does).
You have to crawl through the directories and folders to open and skim through an-hour recording — every time.
There’s a way out. Use Grain.
Search Across Conversations
Grain enables you to record, transcribe, and save your video meetings in a shared workspace. You can access your meetings, anytime by signing in to your workspace. The best part is, you can find any specific moment you’d like to review just by searching for it using a ‘keyword’.
Here’s an example:
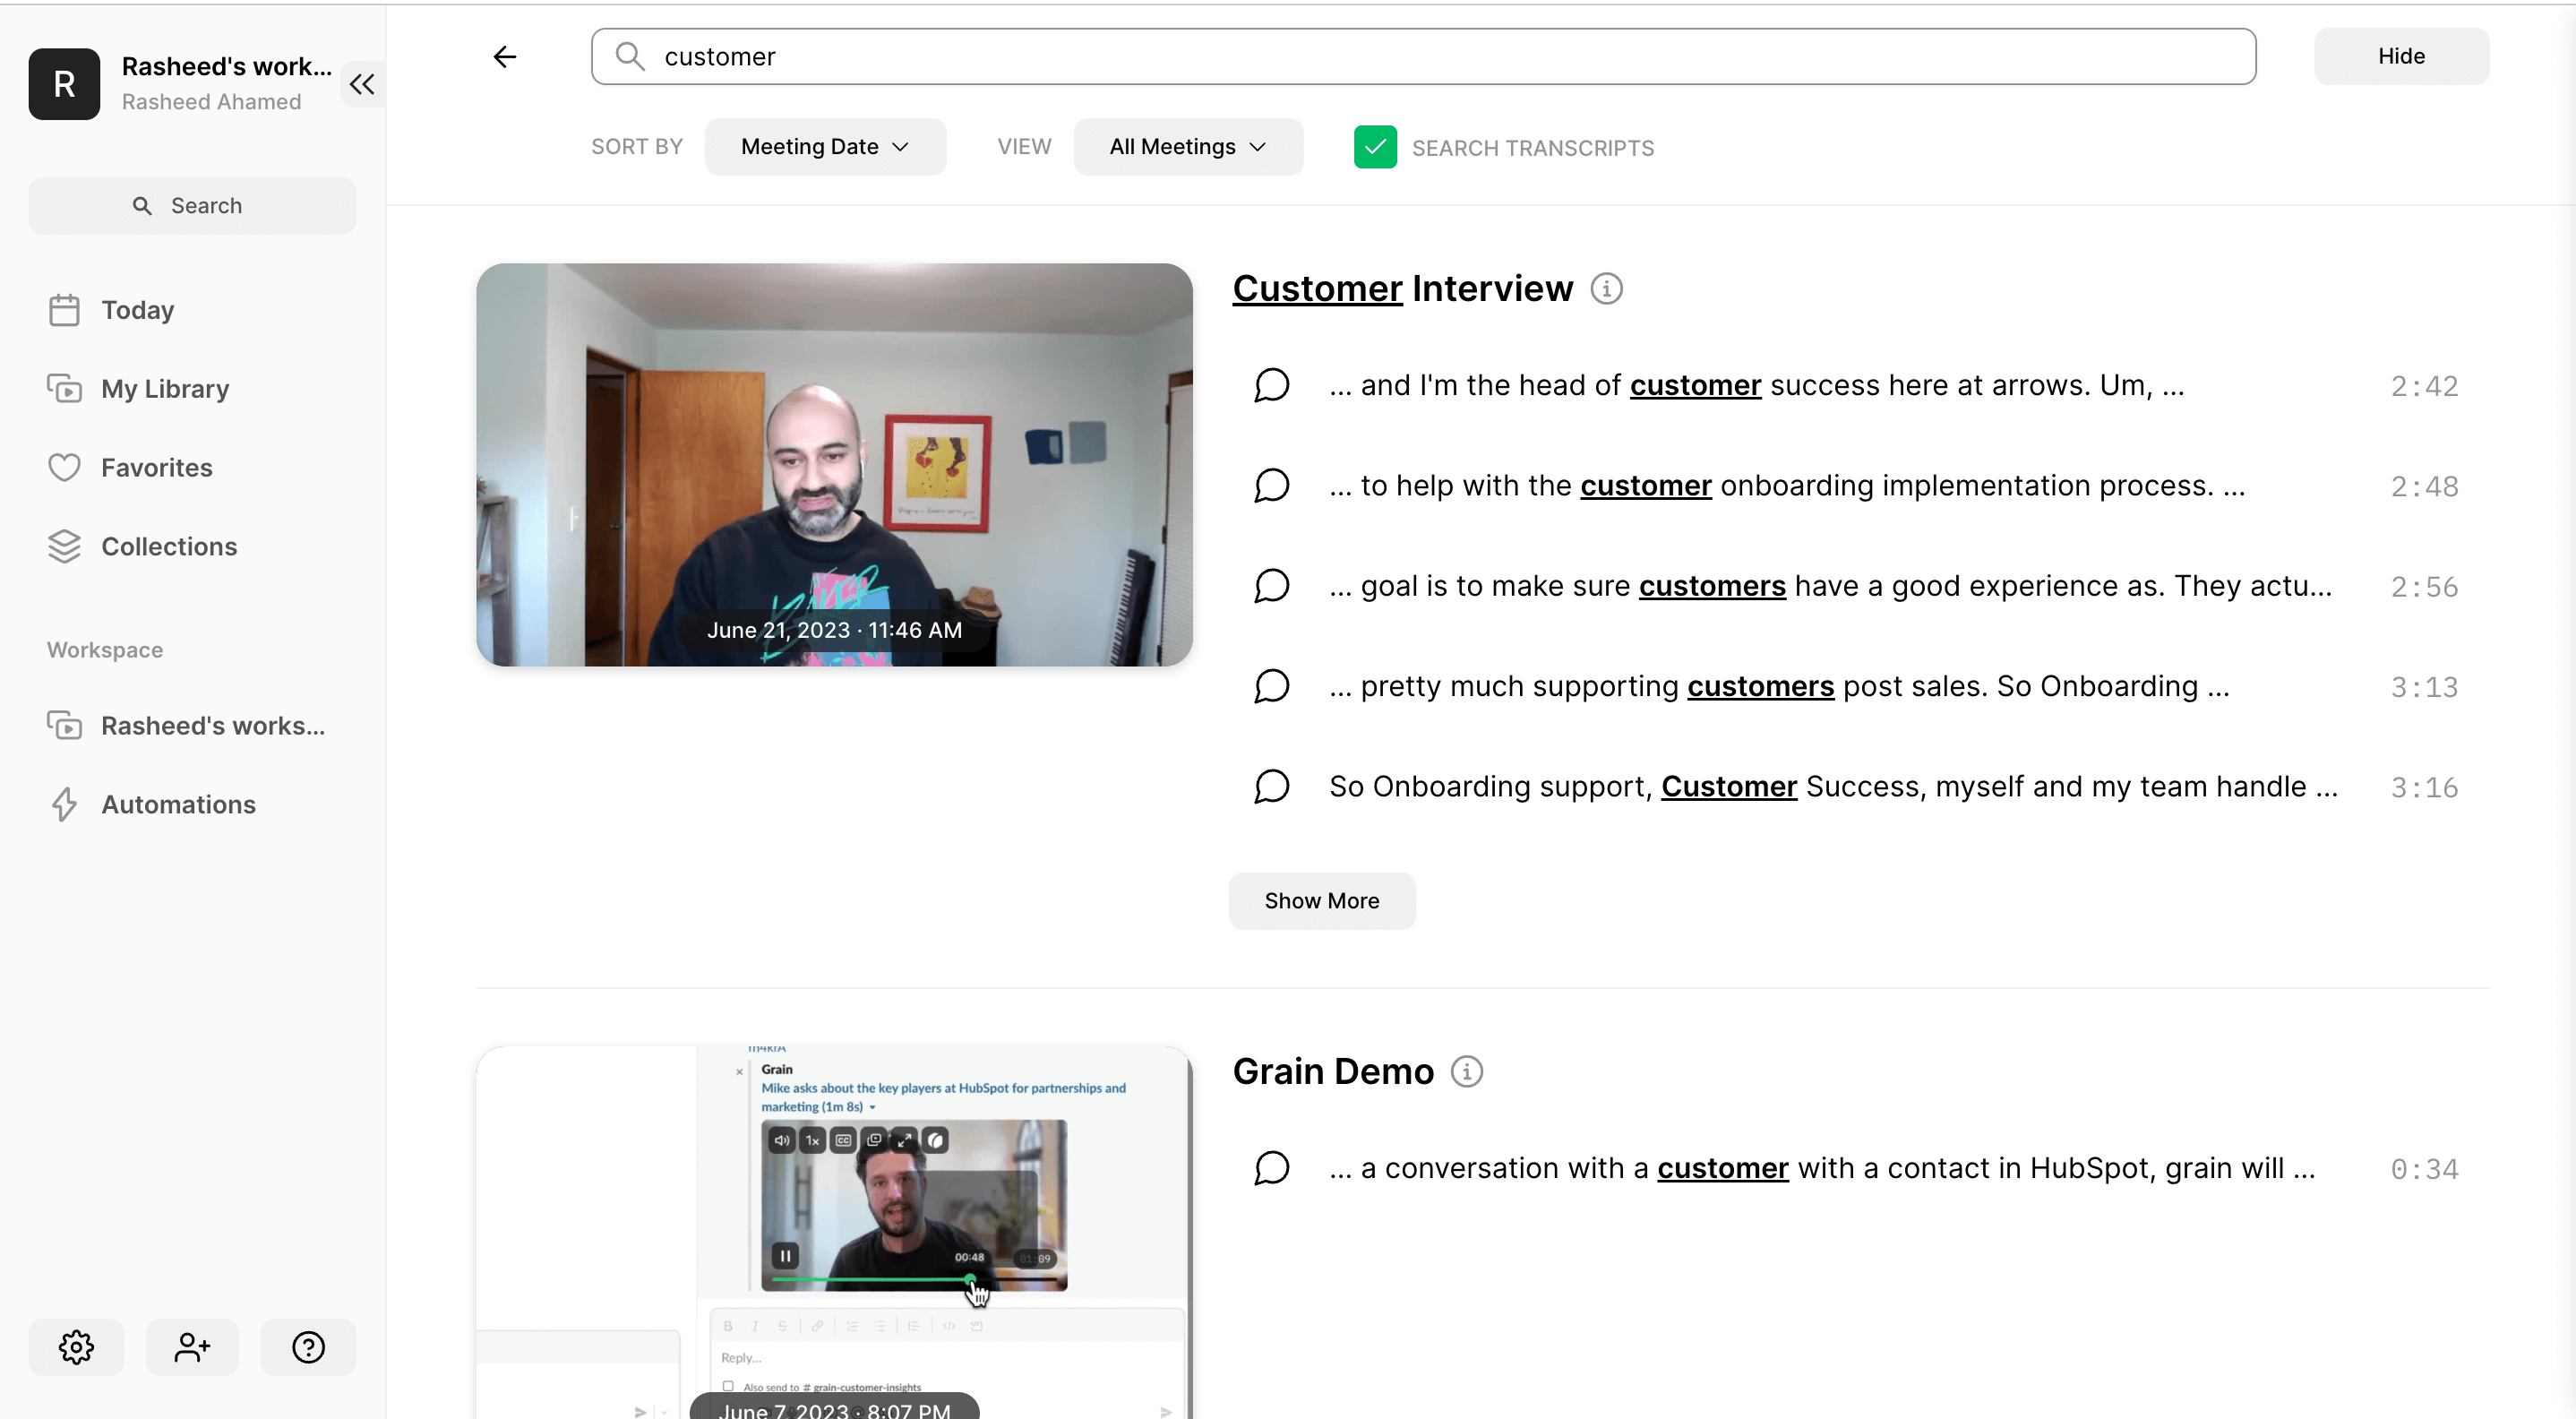
As Grain transcribes your meetings automatically, you'll be able to search across conversations with ease. Grain AI can take notes, update your CRM records, and do lots more. If you record your meetings regularly, Grain can save you 90% of the time and enable you to do more with your recordings!
It takes 30 seconds to start using Grain. Tag along and start the clock!
- Step 1 — Sign up for Grain using your Google/Outlook account and create a workspace.
- Step 2 — Connect your Zoom account to import your recordings from Zoom Cloud in a click. You can also use Grain to record, transcribe, and save your upcoming meetings in your workspace.
- Step 3 — Search through your conversations. Voila!